|
Page X MC40 to Aesica Fort
Milecastles 40 to 43
|
 |
||||||||||||||||||||||||||||||||||||||||||||||||||||||||||||||||||||||||||||||||||||||||||||||||
 |
|||||||||||||||||||||||||||||||||||||||||||||||||||||||||||||||||||||||||||||||||||||||||||||||||
 |
|||||||||||||||||||||||||||||||||||||||||||||||||||||||||||||||||||||||||||||||||||||||||||||||||
 |
|
||||||||||||||||||||||||||||||||||||||||||||||||||||||||||||||||||||||||||||||||||||||||||||||||
|
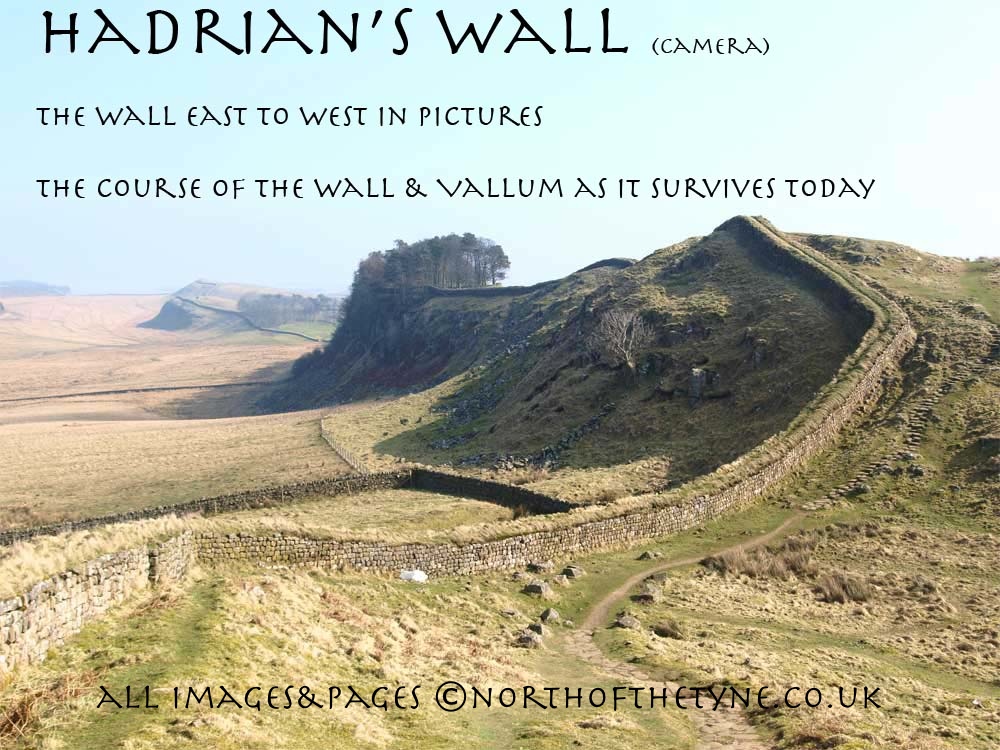
MC 40 Peel Crags to AESICA Fort
From Milecastle 40 on the hill west of Peel Bothy and easily accessible from Once brewed Visitor centre, the Wall ascends over Windshields Crags on its way through the Caw Gap and Cawfields Quarry to AESICA fort, and Milecastle 43 Roman Mile = 1620 yards = 0.92Mile = 1.48km
|
 |
|
|||||||||||||||||||||||||||||||||||||||||||||||||||||||||||||||||||||||||||||||||||||||||||||||
 |
 |
||||||||||||||||||||||||||||||||||||||||||||||||||||||||||||||||||||||||||||||||||||||||||||||||
 |
 |
||||||||||||||||||||||||||||||||||||||||||||||||||||||||||||||||||||||||||||||||||||||||||||||||
 |
|||||||||||||||||||||||||||||||||||||||||||||||||||||||||||||||||||||||||||||||||||||||||||||||||
|
The site of Milecastle 40
At the stile before the Trig Point on Windshieds Crags |
|||||||||||||||||||||||||||||||||||||||||||||||||||||||||||||||||||||||||||||||||||||||||||||||||
 |
 |
||||||||||||||||||||||||||||||||||||||||||||||||||||||||||||||||||||||||||||||||||||||||||||||||
 |
Along this section of the wall one can appreciate the commanding view of the area to the north offered by the Wall which remember stood 15ft at the Parapet 21 ft at the top of the castellation. |
||||||||||||||||||||||||||||||||||||||||||||||||||||||||||||||||||||||||||||||||||||||||||||||||
 |
|||||||||||||||||||||||||||||||||||||||||||||||||||||||||||||||||||||||||||||||||||||||||||||||||
|
The wall in places is Dry stone built almost certainly from stones hewn by the Romans and sitting for the most part on the foundations of the original wall
|
|||||||||||||||||||||||||||||||||||||||||||||||||||||||||||||||||||||||||||||||||||||||||||||||||
 |
|||||||||||||||||||||||||||||||||||||||||||||||||||||||||||||||||||||||||||||||||||||||||||||||||
 |
|||||||||||||||||||||||||||||||||||||||||||||||||||||||||||||||||||||||||||||||||||||||||||||||||
 |
|||||||||||||||||||||||||||||||||||||||||||||||||||||||||||||||||||||||||||||||||||||||||||||||||
 |
 |
||||||||||||||||||||||||||||||||||||||||||||||||||||||||||||||||||||||||||||||||||||||||||||||||
 |
|||||||||||||||||||||||||||||||||||||||||||||||||||||||||||||||||||||||||||||||||||||||||||||||||
 |
|||||||||||||||||||||||||||||||||||||||||||||||||||||||||||||||||||||||||||||||||||||||||||||||||
|
|||||||||||||||||||||||||||||||||||||||||||||||||||||||||||||||||||||||||||||||||||||||||||||||||
|
<<<<<<<<<<<< The site of Milecastle 41
|
|||||||||||||||||||||||||||||||||||||||||||||||||||||||||||||||||||||||||||||||||||||||||||||||||
 |
 |
||||||||||||||||||||||||||||||||||||||||||||||||||||||||||||||||||||||||||||||||||||||||||||||||
 |
At Caw Gap,the Wall is crossed here by the road between Shield on the Wall and Edges Green On the West side of the road the Fighting Ditch makes an appearance not having been required along the high Winn Sill from the picture above you can see the width of the Berm between the wall and the Ditch.
In literature and in historical archeology you will see the Wall variously referred to as the Murus and the Ditch as the Fosse |
||||||||||||||||||||||||||||||||||||||||||||||||||||||||||||||||||||||||||||||||||||||||||||||||
 |
|||||||||||||||||||||||||||||||||||||||||||||||||||||||||||||||||||||||||||||||||||||||||||||||||
|
Turret 41a
|
|||||||||||||||||||||||||||||||||||||||||||||||||||||||||||||||||||||||||||||||||||||||||||||||||
|
On the Picts side of the Wall at Turret 41a >>>
|
 |
||||||||||||||||||||||||||||||||||||||||||||||||||||||||||||||||||||||||||||||||||||||||||||||||
 |
|||||||||||||||||||||||||||||||||||||||||||||||||||||||||||||||||||||||||||||||||||||||||||||||||
|
The Wall is seen here fitting around the base stones of theGreat Whin Sill >>
|
 |
||||||||||||||||||||||||||||||||||||||||||||||||||||||||||||||||||||||||||||||||||||||||||||||||
 |
|||||||||||||||||||||||||||||||||||||||||||||||||||||||||||||||||||||||||||||||||||||||||||||||||
 |
 |
||||||||||||||||||||||||||||||||||||||||||||||||||||||||||||||||||||||||||||||||||||||||||||||||
 |
|||||||||||||||||||||||||||||||||||||||||||||||||||||||||||||||||||||||||||||||||||||||||||||||||
 |
|||||||||||||||||||||||||||||||||||||||||||||||||||||||||||||||||||||||||||||||||||||||||||||||||
|
|||||||||||||||||||||||||||||||||||||||||||||||||||||||||||||||||||||||||||||||||||||||||||||||||
 |
|||||||||||||||||||||||||||||||||||||||||||||||||||||||||||||||||||||||||||||||||||||||||||||||||
 |
 |
||||||||||||||||||||||||||||||||||||||||||||||||||||||||||||||||||||||||||||||||||||||||||||||||
|
|||||||||||||||||||||||||||||||||||||||||||||||||||||||||||||||||||||||||||||||||||||||||||||||||
|
<<<<<<<<< Milecastle 42 Cawfields
|
|||||||||||||||||||||||||||||||||||||||||||||||||||||||||||||||||||||||||||||||||||||||||||||||||
 |
 |
||||||||||||||||||||||||||||||||||||||||||||||||||||||||||||||||||||||||||||||||||||||||||||||||
 |
<<<<<<The Vallum comes very close to the wall here. It has been following the valley to the south of the Wall. It can be seen quite clearly in the grass.
|
||||||||||||||||||||||||||||||||||||||||||||||||||||||||||||||||||||||||||||||||||||||||||||||||
|
Immediately beyond Milecastle No.42 the Wall can be seen to climb up the steep hill beyond. Access to the very top is denied quite properly the ridge along which the wall ran having been quarried away leaving a precipice down to the Quarry Pond.
|
|||||||||||||||||||||||||||||||||||||||||||||||||||||||||||||||||||||||||||||||||||||||||||||||||
 |
|||||||||||||||||||||||||||||||||||||||||||||||||||||||||||||||||||||||||||||||||||||||||||||||||
 |
|||||||||||||||||||||||||||||||||||||||||||||||||||||||||||||||||||||||||||||||||||||||||||||||||
 |
|||||||||||||||||||||||||||||||||||||||||||||||||||||||||||||||||||||||||||||||||||||||||||||||||
|
The Wall made its way along the top the now dissapeared ridge. The pond and the carpark now on the line and behind the restrooms there is a small hillock at the axis of the turn in the Wall taking the line down over theHaltwhistle Burn and up and on to AESICA Fort.
|
|||||||||||||||||||||||||||||||||||||||||||||||||||||||||||||||||||||||||||||||||||||||||||||||||
 |
 |
||||||||||||||||||||||||||||||||||||||||||||||||||||||||||||||||||||||||||||||||||||||||||||||||
 |
 |
||||||||||||||||||||||||||||||||||||||||||||||||||||||||||||||||||||||||||||||||||||||||||||||||
|
The large tree at the approach to the B & B sits on the Wall line and beyond the building the Fighting Ditch can be clearly seen. The Ditch follows the line of the Wall at the top of the hill as it curves round the site of Turret 42b and on to Milecastle 43 and the Fort of AESICA
|
|||||||||||||||||||||||||||||||||||||||||||||||||||||||||||||||||||||||||||||||||||||||||||||||||
 |
 |
||||||||||||||||||||||||||||||||||||||||||||||||||||||||||||||||||||||||||||||||||||||||||||||||
 |
|||||||||||||||||||||||||||||||||||||||||||||||||||||||||||||||||||||||||||||||||||||||||||||||||
 |
|||||||||||||||||||||||||||||||||||||||||||||||||||||||||||||||||||||||||||||||||||||||||||||||||
 |
|||||||||||||||||||||||||||||||||||||||||||||||||||||||||||||||||||||||||||||||||||||||||||||||||
|
The site of Turret 42b >>>>>>
and a couple of locals |
|||||||||||||||||||||||||||||||||||||||||||||||||||||||||||||||||||||||||||||||||||||||||||||||||
 |
A look back to the east from the site of Turret 42b to Cawfields Crags and the high ground of Windshield Crags |
||||||||||||||||||||||||||||||||||||||||||||||||||||||||||||||||||||||||||||||||||||||||||||||||
 |
 |
||||||||||||||||||||||||||||||||||||||||||||||||||||||||||||||||||||||||||||||||||||||||||||||||
 |
 |
||||||||||||||||||||||||||||||||||||||||||||||||||||||||||||||||||||||||||||||||||||||||||||||||
 |
 |
||||||||||||||||||||||||||||||||||||||||||||||||||||||||||||||||||||||||||||||||||||||||||||||||
|
Below -- Milecastle No.43 Great Chesters (Aesica)
|
|
||||||||||||||||||||||||||||||||||||||||||||||||||||||||||||||||||||||||||||||||||||||||||||||||
 |
|||||||||||||||||||||||||||||||||||||||||||||||||||||||||||||||||||||||||||||||||||||||||||||||||
 |
|||||||||||||||||||||||||||||||||||||||||||||||||||||||||||||||||||||||||||||||||||||||||||||||||
|
Milecastle 43 and AESICA Fort
Milecastle 43 was already partly erected in accordance with the First Plan and once more the plan itself was ignored, the possibility of an eventual conjunction with the wall entirely disregarded. Here at Greatchesters to have built (the fort north wall) north of the Broad Foundation would have meant building on the berm between the Broad Foundation and the Fighting Ditch, and therefore on unstable ground. The substitute line selected by the fort's engineers was immediatly behind the Broad Foundation and ran directly through the east and west walls of the milecastle which was levelled to take it. *1 Greatchesters The Amiens skillet calls it "Esica" as does the Ravenna list. The Notilia calls it "AESICA" An area covered of about three acres. It is unusual in having a duplication of Ditches in its surrounds. Bruce, reminds us of an earlier discovery of an Aquaduct traced from the Caw Burn some two miles distant from the fort, over a distance of six miles, to come within a few hundred yards. There has been much speculation through the years regarding AESICA's place in the scheme of the wall. The debate centering around the north wall of the Fort and its integration and conjunction with the Defensive Wall at the NW corner. * "Everything about the northwest corner of Greatchesters suggests that, as at Housesteads, it was built in the certainty that the Broad wall was abandoned , in the belief that the fort would have to stand alone, and before the necessity with the Narrow Wall was considered.*2 Pictures and more information about the Fort on the next page. |
|||||||||||||||||||||||||||||||||||||||||||||||||||||||||||||||||||||||||||||||||||||||||||||||||
|
References for Page 10 *1 David Devine -The Northwest Frontier of Rome 1969 p124 *2 David Devine -The Northwest Frontier of Rome 1969 p126 The plan of Greatchesters Fort taken from Frank Graham "The Roman Wall Comprehensive History and Guide" 1979 |
 |
||||||||||||||||||||||||||||||||||||||||||||||||||||||||||||||||||||||||||||||||||||||||||||||||
|
<<<< the Wall going westward to Cockmount Hill and on to Carvoran and MC46
Next page |
|||||||||||||||||||||||||||||||||||||||||||||||||||||||||||||||||||||||||||||||||||||||||||||||||
 |
|||||||||||||||||||||||||||||||||||||||||||||||||||||||||||||||||||||||||||||||||||||||||||||||||
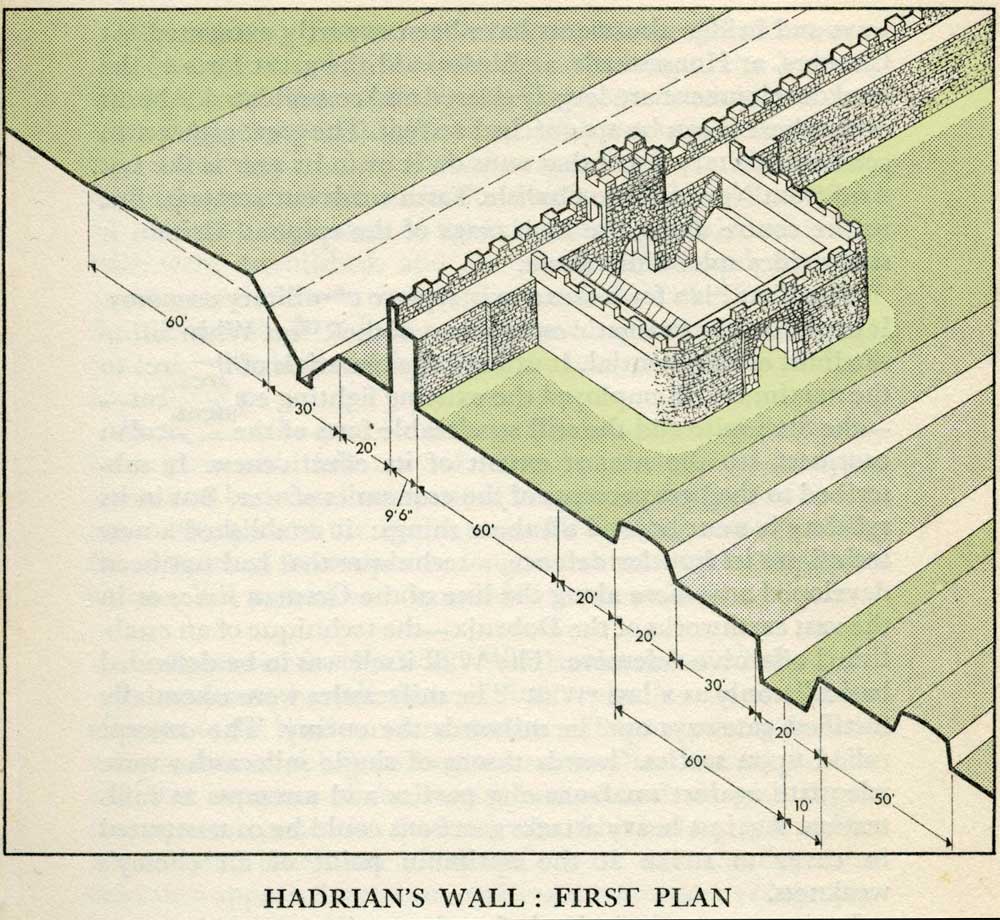 |
Milecastles
This first plan provided for a wall 10ft wide, 15ft 6 inches high and surmounted by a 6ft crenellation. to the north of this was a 20 ft berm, a standard fighting ditch 30ft by 13ft 6 inches, and a glacis composed of the spoil of the ditch, approximately 60ft in width. At each Roman mile was a milecastle with a north gate opening through the Wall, surmounted by a defensive turret and a south gate. In the original plan there were two barracks and the milecastle maintained a turret on either hand for the patrol garrison. South of the wall was the Vallum, a complex consisting of a 20 ft ditch with a wide bottom section and mounds composed of spoil to north and south. The wall was built to the design width only on the eastern slope. The Milecastles built before the change of plan had 10ft wings on either side. The curtain wall as finally built was substantially narrower and the join is indicated in the diagram. This information and the diagram taken from Richard Devine The Northwest Frontier of the Roman Empire Chap2 pg 27 |
||||||||||||||||||||||||||||||||||||||||||||||||||||||||||||||||||||||||||||||||||||||||||||||||
 |
|
||||||||||||||||||||||||||||||||||||||||||||||||||||||||||||||||||||||||||||||||||||||||||||||||
 |
|||||||||||||||||||||||||||||||||||||||||||||||||||||||||||||||||||||||||||||||||||||||||||||||||